 inquiry@kinocranes.com
 +86-15993036980
 inquiry@kinocranes.com
 +86-15993036980
Henan Kino Cranes Co., Ltd
No.730, Xinghai Center, Hongqi District, Xinxiang, Henan, China
Tel: +86-373-3809941
M/P: +86-15993036980
E-mail: inquiry@kinocranes.com
Official Website: www.kinocranes.com

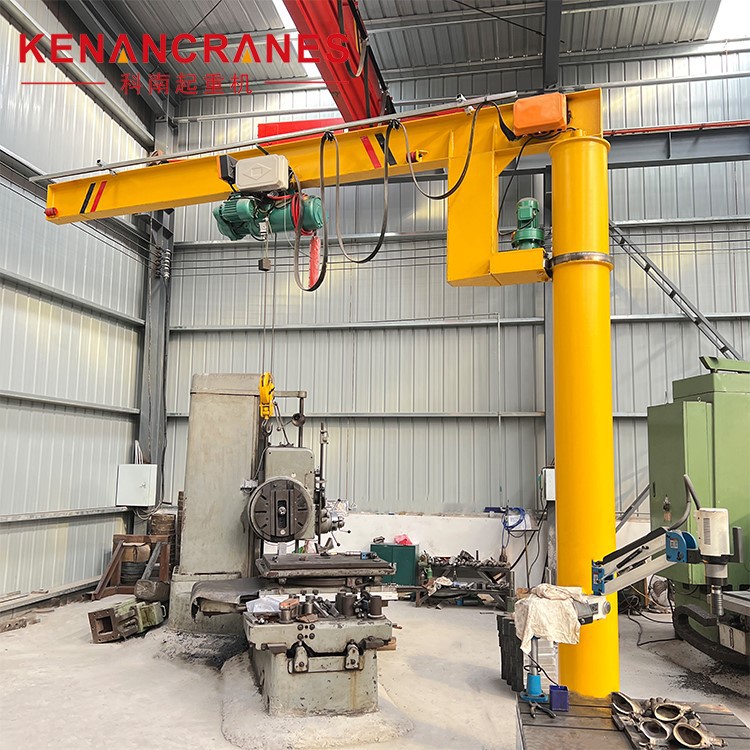
Column Jib Crane
Column jib crane is a kind of lifting equipment that is more widely used nowadays. It has high reliability, design and short-distance frequent lifting tasks, and flexible operation, which greatly improves work efficiency. So, how is it installed?
Before the cantilever crane is installed, preparations must be made:
Check whether the product and technical documents are missing or lost according to the packing list. If the jib beam is bent, twisted, deformed or bruised during transportation, it should be corrected or restored respectively. After checking that the delivered products are correct, the next step is installation. Generally, manufacturers cannot be present, and telephone guidance will be better.
1. Column installation
When installing the column, the column should be kept vertical to the ground, and the anchor plate screws should be tightened firmly without loosening. The base plate and foundation should fit well. If an electric hoist is equipped, the foundation should have embedded cables and grounding facilities. The embedded cables are led out from the center of the foundation, and the grounding resistance should not exceed 4Ω.
2. Cantilever beam installation
To install the cantilever beam, please proceed in the following order:
1) First lift the beam horizontally.
2) Connect the slewing device to the swivel arm beam. Install the reducer.
3) Install the electric hoist and the trolley on the track of the cantilever beam.
4) The fourth step is to install the sliding contact wire frame and steel wire rope or C-shaped track on the top of the cantilever beam. The rope is stringed into the sliding ring and tightened. There is a small pulley in the track, and it should be placed at the same time as the electrical control box on the electric hoist. On one side.
5) Connect and install all electrical appliances on the beam, and leave a power cord of appropriate length.
After the above steps are completed, the overall hoisting of the cantilever beam can be carried out.
3. Cantilever lifting
When hoisting, after lifting according to the specified lifting method, align the shaft with the bearing hole on the top of the column, and slowly lower the roller against the raceway of the column. After adjusting the appropriate position, use washers, round nuts and round nut stop washers to fix the shaft through the side holes on the upper part of the column. Then drag the collector ring with one hand, pass it through the side hole on the upper part of the column, and put it on the beam shaft.
Then, connect the wires hanging in the peripheral holes of the beam to the terminals on the collector ring, connect the carbon brushes to the power switch at the bottom of the column with wires, and finally fix the carbon brush holder on the inner wall of the column. Adjust the sliding piece to maintain good contact with the copper ring on the collector ring. Connect the power supply and start the test run.
Finally, there are the following considerations:
1. When installing collector rings and other components in the column, necessary measures (such as tying them with ropes in advance) should be taken to prevent them from accidentally falling into the column.
2. If this machine is installed and used outdoors, reliable rainproof measures must be installed;
After assembling the cantilever beam and column, the following three points should be done:
①The rollers and raceways should fit well.
②The swivel arm can flexibly rotate 360° around the column,
③Adjust the adjusting gasket so that the end of the cantilever beam reaches the upper deflection F≥R/250 (R is the radius of gyration).